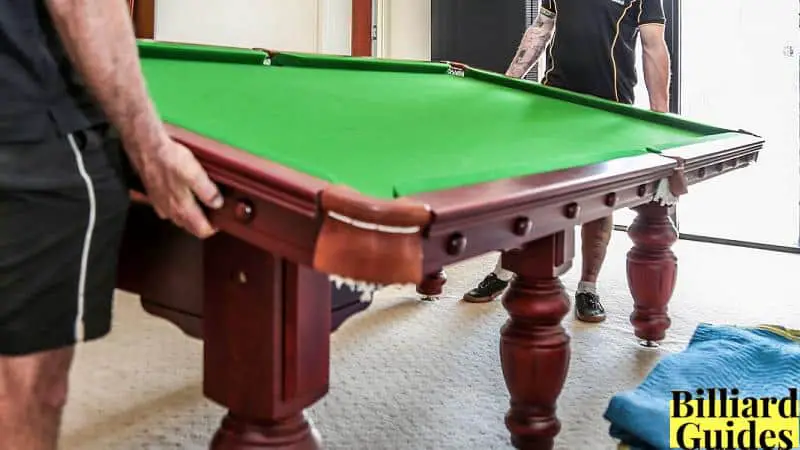
Because of its weight and size, a pool table can not be moved easily anywhere. You should always disassemble a furniture-style pool table before moving it, even if you just plan to move it to another room. If possible, hire a professional to click for you. If you want to save money doing it yourself, you can follow the steps below.
With a handful of tools and a little effort, you can take a pool table apart in a few hours. Each brand of a pool table has its own unique construction, and since full-size pool tables range from 450 to 525 pounds. (1000 to 1150 kg), it would be better if at least two people work together.
How to Disassemble a Pool Table
ALWAYS follow the manufacturer’s assemble/disassemble instructions. However, so that you can get an idea of how the assembly steps of a pool table are, we offer you a small guide that can be used both for assembly and disassembly of the pool table.
Caution: Put on the dust mask and goggles before beginning disassembly.
Step 1: Pull out the pockets
All standard pool tables have four pockets on the corners and two on the sides. Depending on your pool table’s design, these can be fixed in various ways, although generally, they will be using staples or screws. If they are stapled, lie on your back under the pocket and pry the staples out with the help of a flat screwdriver or staple remover.
Don’t forget to keep the pockets, rails, and all screws somewhere safe where you can find them later. We recommend that you keep all the components of your pool table, especially screws, bolts, staples, etc. In the same place. Small parts are easy to misplace, and sometimes a missing pair of nuts can lead to problems reassembling the table.
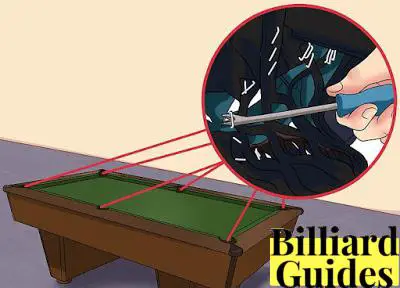
Step 2: Unscrew the screws
Once you have removed all the clips, use a wrench to remove the bolts from the rails’ bottom. Usually, there are three screws for each rail. Set them aside in a Ziploc bag, so you don’t have to worry about losing any in the process of dismantling the rest.
Step 3: remove the rails
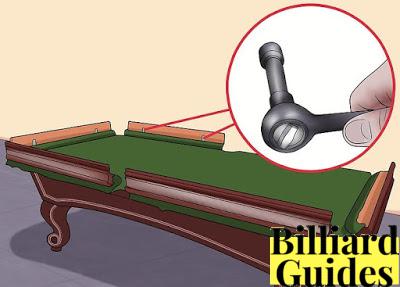
With more modern tables, remove the screws from under the table. Older boards may have bolts on the sides instead of underneath. Depending on the table’s design, the rails will either come off immediately or need to slide out of a carved channel once the bolts are removed.
There are generally three different types of railings on pool tables. The individual rails can simply be separated from the others. On the other hand, if you have two horseshoe-shaped rails connected to each side of the side pockets, they can be separated from the connection. The rails that are connected to each other can help you to flip them simultaneously. These pieces are heavy; Be careful not to tear the side pockets when flipping them. Once you have removed the rails, disconnect the pockets as well.
Step 4 – Remove the felt
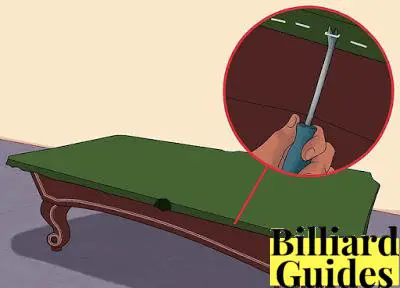
Decide in advance if the cloth is taped or glued to the table. If it is stapled, you will require the staple remover or needle-nose pliers to remove the staples.
If the felt is adhered in place, carefully lift it off the surface slowly, in a backward motion. You will need to use a straight razor or flat-head screwdriver to remove it from the table.
If you pull it forward or upward, the felt will touch a stretch and create bumps when re-glued. Be especially careful when removing felt near pockets.
You must be very careful since even a small break can force you to upholster the table with new felt. If the felt is fastened with staples, remove them one by one and very carefully, you can use a flat tool to lift them, paying attention not to damage the fabric.
Whereas, if the felt is glued, pull the edge back very carefully across the entire table. Once you have removed it, it must be folded and stored carefully to avoid wrinkles. we have an in-depth article about how to remove the pool table felt, consider reading it.
Step 5 – Fold the felt
Once the felt is removed, fold it off. Avoid pressing on the bent edges, as this could create lines in the field when reattached to the pool table.
Step 6 disassemble the board
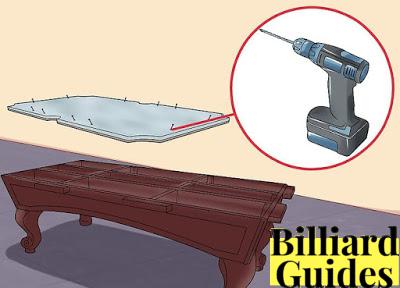
Most of the tables are built with 3 slabs of heavy slate. Extra help is beneficial to eliminate them.
If you plan to reassemble the table (rather than discard it), then the slate should slide off the table before lifting it up, and you should be careful not to chip, dent, or drop any of the tiles.
The slate is often screwed to the frame. Also, the 3 slabs are usually screwed together. Remove the bolts and screws and then slide each slate slab out of the frame before lifting.
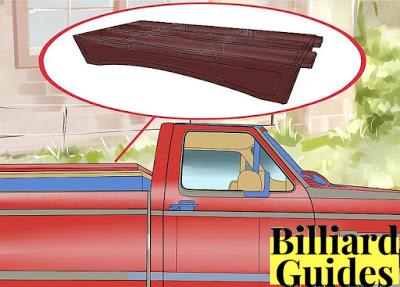
If you are reassembling the table later, position the slate pieces so that the flat side of a slate of part 1 is on top of the slate side of part 2. With the rough bottom of part 2 facing up, place piece 3 rough side down. Placing the slate against the rough underside of another slab will potentially damage the slate. If it will be stored for more than a week, place the board on its side, well supported, rather than flat on the ground. This way, it is less likely to be distorted.
Step 7: Disassemble the legs
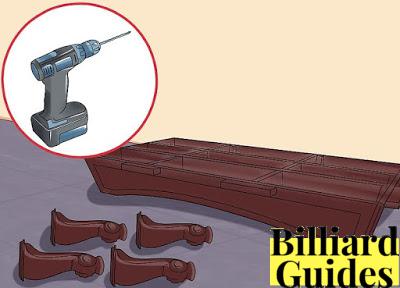
After removing and securing the board, you can start to relax… and, compared to taking apart the delicate felt or the board base, unscrewing the legs is a simple task.
Step 8 – Finish by removing the legs
Lastly, remove the legs from the pool table. At this point, your pool table has been disassembled enough, and you are ready to move.
Tips
Keep reusable bags handy to store nuts and bolts when removing them. Label each bag for easy reassembly.
Many pool tables have adjustable legs or small wooden wedges to level the playing surface. You will need to level the pool table again after transporting it. Some tables also have shims attached to the board’s side to keep it level if the frame is weak or bent.
Necessary materials
- Screwdriver
- Marked bags for storing bolts and nuts
- Drill and screwdriver tip
Interesting Articles to Read
- Best Pool Cues: Top 13 Picks
- Best Pool Tables: Our Top 9 Picks
- Top 13 Best Break Cue [#2 is Our Favorite]
- 7 Best Pool Cue for Advanced Players
- 11 Best Pool Tables for Kids
- The 10 Best Pool Cue Tips (Ultimate Guide)
